How to Make Gabion Cages? A Step-by-Step Guide
Gabion cages, with their combination of functionality and aesthetic appeal, have become increasingly popular in landscaping projects. These wire-mesh containers filled with stones or other materials serve various purposes, including retaining walls, erosion control, and even artistic installations. In this comprehensive guide, we’ll walk you through the process of making gabion cages, allowing you to enhance your outdoor space with a touch of creativity and sustainability.

Materials Needed:
Before diving into the construction process, gather the necessary materials:
- Welded wire mesh panels
- Galvanized wire or hog rings
- Stone or rocks for filling
- Wire cutters
- Gloves
- Ties or fasteners
- Level
- Shovel
- Wheelbarrow

Step 1: Planning and Design
Start by planning your gabion project. Consider the purpose, dimensions, and location of the cages. Sketch a design to visualize the final result. Pay attention to the terrain and any specific needs such as water drainage or soil stabilization.
Step 2: Cutting and Assembling Mesh Panels
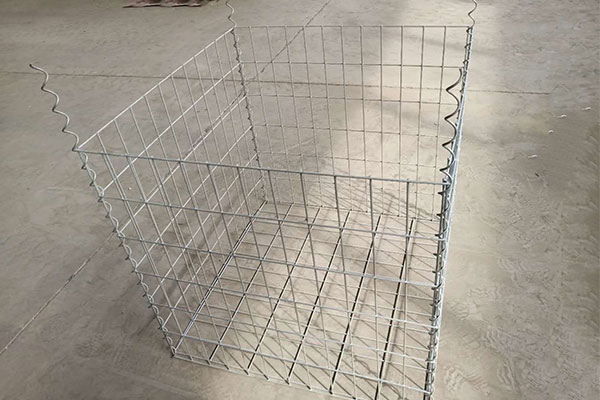
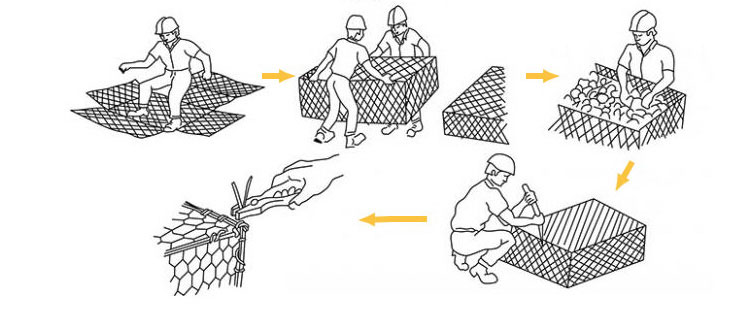
Using wire cutters, trim the mesh panels to the desired size for your gabion cages. Lay out the panels on a flat surface, ensuring they align correctly. Use galvanized wire or hog rings to connect the edges securely. This will form the basic structure of the gabion cage.
Step 3: Filling the Cage
Once the structure is in place, it’s time to fill the gabion cage with stones or other chosen materials. Select stones that are durable and can withstand outdoor elements. Use a shovel and a wheelbarrow to transport and fill the cage evenly. Periodically check for proper distribution and compact the material to ensure stability.
Step 4: Closing the Cage
After filling the gabion cage, securely close the top by folding and fastening the mesh panels. Use ties or fasteners to ensure a tight seal. This step is crucial for maintaining the structural integrity of the cage and preventing the fill material from shifting.
Step 5: Placement and Leveling
Carefully place the gabion cages in the desired location, ensuring they are level and stable. Use a level to check for evenness. If your project involves multiple gabion cages, connect them securely using additional wire or ties.
Step 6: Finishing Touches
Take a step back and inspect your gabion cage. Make any necessary adjustments to ensure it meets your design specifications. Consider adding decorative elements or incorporating plants to enhance the visual appeal.
Conclusion:
Creating gabion cages is a rewarding DIY project that adds both functionality and beauty to your outdoor space. By following these steps, you can successfully construct gabion cages for various purposes, from retaining walls to artistic installations. Embrace the versatility and sustainability of gabion structures, and transform your landscape into a unique and visually appealing environment.

